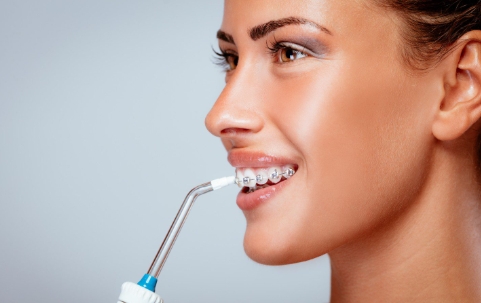
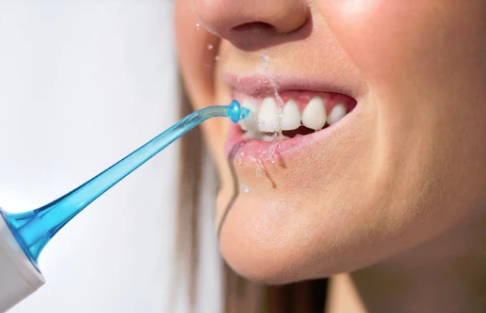
Using a water flosser can be a game-changer for your oral hygiene routine. These handy devices offer a thorough and effective way to remove plaque and debris from between your teeth and along your gum line. If you are new to water flossing and wondering how to use a water flosser, don’t worry; it can seem daunting at first, but once you get the hang of it, it becomes a quick and easy step in your daily routine. This guide will walk you through everything you need to know, from setup to technique and maintenance. With regular use, you’ll notice healthier gums, fresher breath, and a cleaner mouth overall, giving you the confidence of optimal oral hygiene.

What Is a Water Flosser and Why Use One?
A water flosser, also known as an oral irrigator, is a dental device designed to clean between your teeth and along your gum line with a stream of pulsating water. Unlike traditional dental floss, which can sometimes be harsh on your gums, a water flosser offers a gentle and effective alternative. Using a water flosser has several benefits. First, it is excellent for people with braces, implants, or bridges as it can effectively clean around these dental appliances. Second, it’s easier for those with dexterity issues because you don’t need to maneuver floss between your teeth manually. Third, studies have shown that water flossers can be more effective at reducing gingival bleeding and plaque compared to string floss. In essence, incorporating a water flosser into your daily routine can significantly enhance your oral health.
How to Set Up Your Water Flosser
Setting up your water flosser correctly is essential for effective use. Start by removing the device from its packaging and reading the manufacturer’s instructions. Most water flossers come with a water reservoir, handle, and several flossing tips. First, fill the water reservoir with lukewarm water. Avoid using hot or cold water as it can be uncomfortable on your gums. Next, attach the desired flossing tip to the handle. Most devices offer different tips for various needs, such as plaque control or orthodontic use. Once the tip is securely attached, plug the flosser into an electrical outlet. If your model has settings for water pressure, start with a lower setting to get accustomed to the sensation. You can gradually increase the pressure as you become more comfortable. Make sure the unit is placed on a flat surface to prevent spills and fill the reservoir before every use.
How to Use a Water Flosser: Step-by-Step Guide
Step 1: Positioning the Flosser Properly
To begin using a water flosser, ensure you are positioned correctly over the sink to prevent any water splashes. Hold the flossing handle comfortably and place the tip inside your mouth, making sure your lips are slightly closed to avoid water spraying out. Position the tip at a 90-degree angle to your gum line for the most effective cleaning. This angle allows the water stream to efficiently target the spaces between your teeth and along the gum line, helping to dislodge food particles and plaque. Proper positioning ensures that the water stream reaches all areas, providing optimal cleaning results.
Step 2: Adjusting the Water Pressure Settings
Finding the right water pressure setting is crucial for a comfortable and effective flossing experience. If you are new to using a water flosser or have sensitive gums, it’s a good idea to start with a low-pressure setting. Once you have turned on the flosser, gradually increase the water pressure until it feels comfortable and effective without causing discomfort. While higher pressure can offer a deeper clean, it may feel too intense, especially for beginners, so be mindful of your comfort level. Consistency in using the right setting will ensure you maintain optimal oral hygiene every day.
Step 3: Starting the Flossing Process
Once you’ve set your desired water pressure, begin the flossing process by focusing on the back of your mouth. Slowly glide the tip of the flosser along your gum line, pausing briefly between each tooth to ensure thorough cleaning. Allow the water to flow out naturally into the sink by keeping your mouth slightly open. Work your way systematically around your mouth, ensuring you cover all surfaces of your teeth, including the front, back, and sides. This process ensures that every area receives the attention it needs to remove food particles and plaque, leaving your mouth feeling fresh and clean.

Step 4: Targeting Key Areas
Certain areas of your mouth may require more focused attention, such as the gum line, where plaque tends to build up. If you wear braces, bridges, or any other dental appliances, these areas will also need extra care. Spend a little more time cleaning around these appliances to remove food particles and plaque. It’s also essential to clean both the inner and outer surfaces of your teeth, as these areas can accumulate plaque as well. By targeting these key areas, you ensure a more thorough cleaning, which helps to reduce the risk of gum disease and cavities.
How to Clean and Maintain Your Water Flosser
Cleaning the Water Reservoir
Regular cleaning of the water reservoir is an essential part of maintaining your water flosser. After each use, be sure to empty the reservoir and rinse it thoroughly with warm water to prevent any build-up of bacteria or mold. Once rinsed, allow the reservoir to air dry completely. To ensure the flosser stays hygienic, it’s recommended to clean the reservoir with a mild detergent or a solution of water and vinegar once a week. This helps to remove any residue and prevents unpleasant odors. A clean water reservoir ensures that the flosser continues to operate efficiently and hygienically.
Maintaining the Flossing Tips
The flossing tips are a key component of your water flosser, and maintaining them is essential for effective use. After each session, remove the tip and rinse it thoroughly with warm water to keep it clean. If you notice any wear, bending, or clogging, it’s time to replace the tip. Generally, it’s recommended to replace the flossing tips every three to six months, depending on usage and manufacturer recommendations. By keeping the tips clean and regularly replacing them, you ensure that your water flosser performs at its best, preventing the growth of bacteria and maintaining optimal cleaning performance.
Conclusion
Incorporating a water flosser into your daily oral care routine can have a significant impact on your dental health. How to use a water flosser effectively requires understanding the right technique, setting the correct water pressure, and ensuring consistent use. By following this step-by-step guide, you’ll learn how to set up, use, and maintain your flosser properly for the best results. Regular use of a water flosser helps keep your gums healthy, removes plaque effectively, and complements your brushing routine for a deeper clean. Whether you have traditional dental work or orthodontic appliances, using a water flosser can enhance your oral hygiene routine, ensuring your mouth stays fresh and free of plaque. Make water flossing a daily habit for a cleaner, healthier smile!
FAQ
Can I Use Mouthwash in My Water Flosser?
Yes, you can add mouthwash to the water reservoir of your water flosser. Mixing mouthwash with water can provide additional antibacterial benefits and leave your mouth feeling fresher. However, refer to the manufacturer’s guidelines to ensure your specific model supports the use of mouthwash.
How Often Should I Replace the Flossing Tips?
Flossing tips should be replaced every three to six months to maintain efficiency and hygiene. If you notice any wear, fraying, or bending before this period, it’s advisable to replace the tip sooner to ensure better cleaning performance.
Is a Water Flosser Better Than Traditional Flossing?
A water flosser can be more effective in certain situations, such as for individuals with braces or dental implants. It’s gentler on the gums and can cover areas traditional floss might miss. However, traditional flossing still remains highly effective for many and can be used in conjunction with a water flosser for optimal oral health.
